Showing posts with label home. Show all posts

Wednesday, April 5, 2023

Home Project List

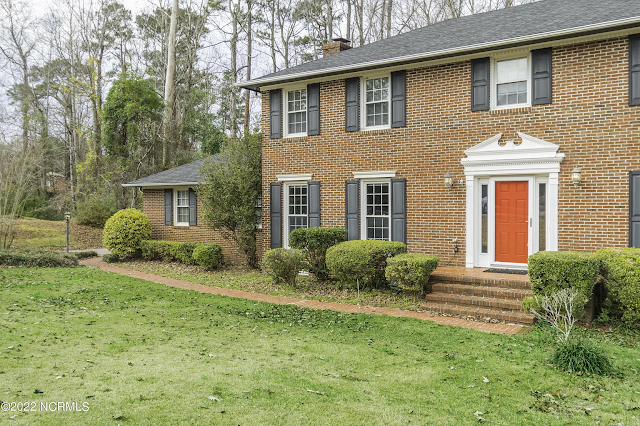
Hey y'all! Today's post is all about our home projects at the new house in Jacksonville. Honestly, this post is more for my brain than anything else but I think it's fun to share projects. I was in the middle of packing up the kitchen and I needed a break to organize my thoughts. First, let's take a moment for those beautiful azaleas in the photo above. That photo was taken recently when Josh stopped by the house. There are so many pretty azalea bushes in bloom there and I'm really excited to see the yard come to life this spring and summer. I've also noticed some buds at our current home and I'm really hoping the new owners appreciate peonies as much as I do because there's going to be a lot of beautiful blooms this season!

P R O J E C T  O N E: The Front Door

That red door has got to go! If you know me then you know that red is my least favorite color. It's just not for me. I absolutely love my pink front door and I love the color that it's painted at our current home. This is actually the second shade of pink that our door has been and I love the more "neutral" pink color that it is currently. The color is called Coral Perfection and it was painted with HGTV HOME by Sherwin-Williams Weathershield Semi-Gloss Exterior paint + primer. We painted our door back in October of 2020 and it still looks as good as new. It's definitely a pricier paint but the results and quality of definitely worth the price tag. We also painted our screen door the same shade of pink and I love it at our current house like that. But. I think I'm going to be keeping the screen door white at the new house because of the white trim and details that currently exist around the front door. I'm really excited to see how a pink door changes up the look of the front of the house!


P R O J E C T  T W O: Raised Flower Beds

Building raised flower beds at the new house is very high on the priority list! I've already told Josh to consider this my Mother's Day gift, lol. I'm hoping to have at least two beds built in the backyard so that I can see the garden from the screened in porch. We may eventually create a similar garden setup as we have now. I have absolutely loved creating The Joy Garden in current backyard and sharing bouquets of free flowers at our flower stand the past two summers. I can't wait to spread some joy in our new neighborhood so new flower beds are a must and those seeds will need to be planted as soon as possible. Our flower stand is definitely making the journey to Jacksonville and I can't wait to fill it with lots and lots of flowers!


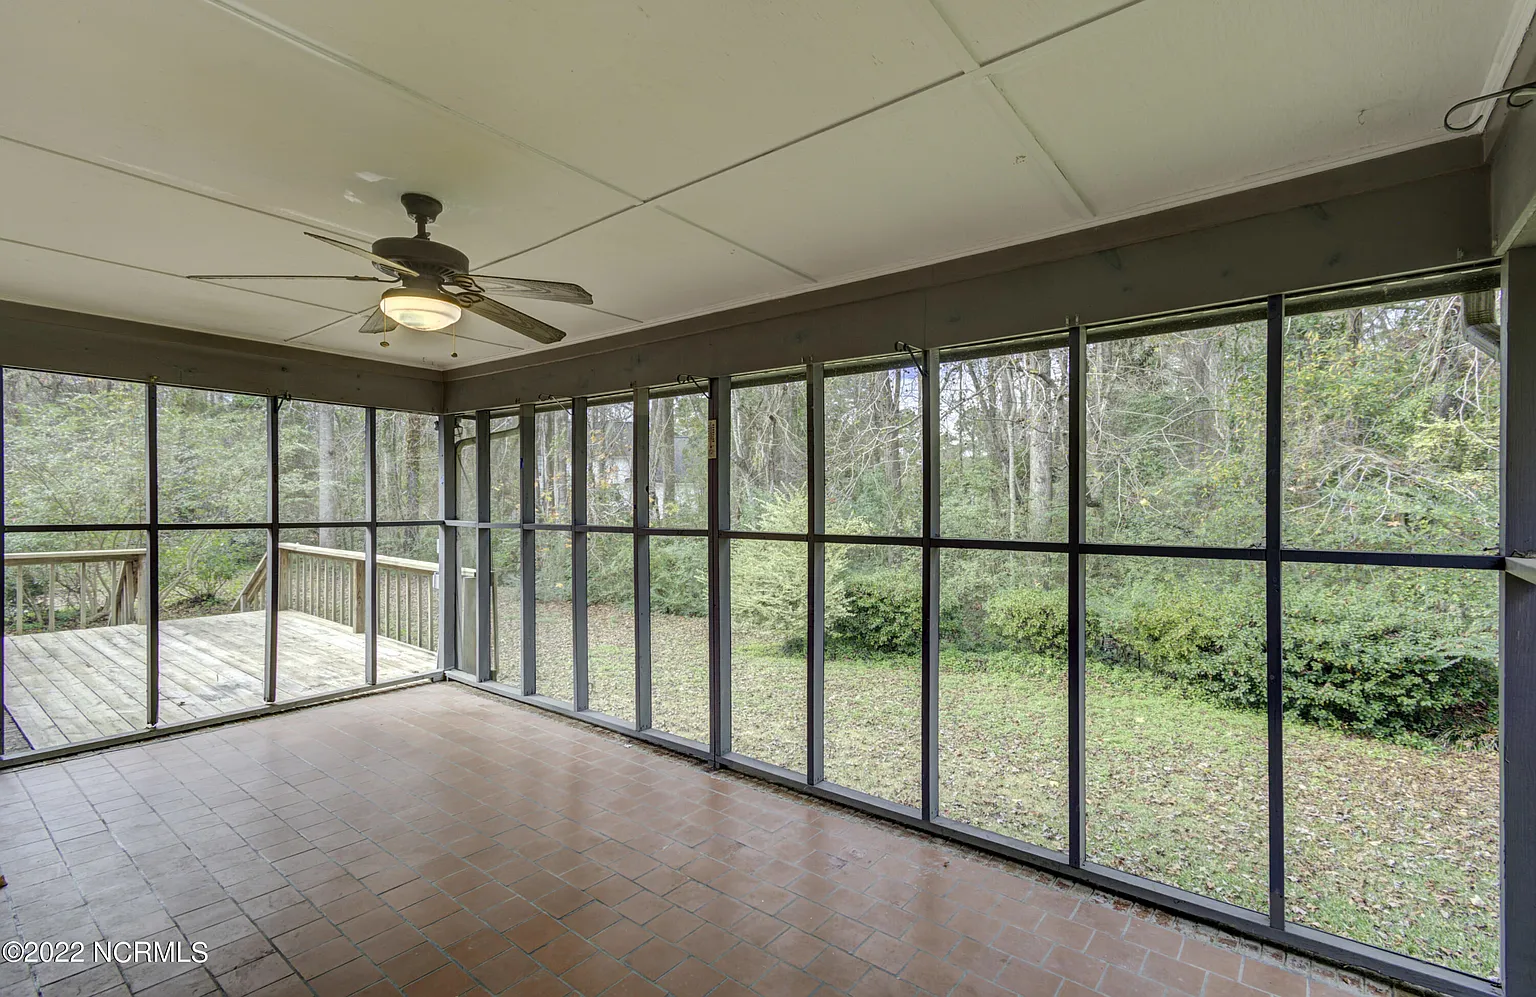
P R O J E C T  T H R E E: Screened In Porch

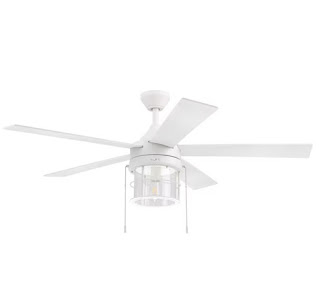
There's so much that I want to do in this area! I already know that I will probably spend more time in here than anywhere else in the house. I have *always* wanted a screened in porch so I can't wait to turn this space into something really special. This will probably be a more long term project as far as upgrades go but the first thing I want to do is change out the ceiling fan to something more my style. I'm also planning to get some fun (and cozy) furniture, a rug, and definitely some sort of swing (I love this one) for this space. I can't wait to sip my morning coffee in here!
P R O J E C T  F O U R: Fireplace Mantle

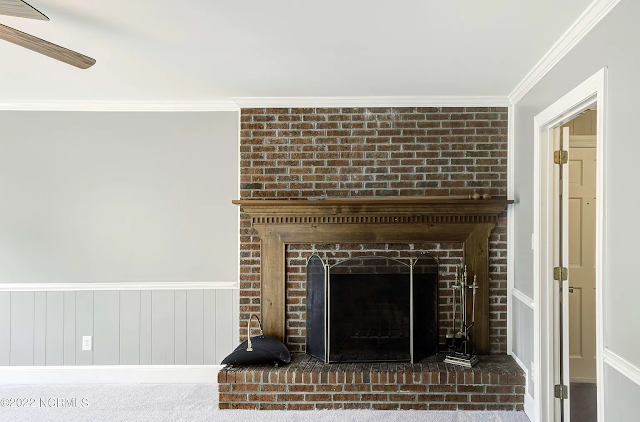
The last project on my mind right now is painting the fireplace mantle. Just the wooden mantle; we are planning to keep the brick it's natural color. The plan is to paint the mantle white so that it stands out on the brick a little bit better. I'm excited to see how it turns out!


Thanks so much for visiting. Stay tuned to see how these projects turn out!

Wednesday, October 28, 2020

Front Porch Makeover


pink front door, front porch makeover, front porch, nc blogger, north carolina blogger
Hey y'all! I hope you are having a wonderful week so far! Today, is all about my recent front porch makeover! Here is what our front porch looked like before, for reference:

pink front door, front porch makeover, front porch, nc blogger, north carolina blogger

I shared bits and pieces about this makeover randomly here on the blog. But in case you missed it, this is how it all got started: we had water damage on our front porch roof. We had to get it repaired and after we did that, we needed a new light on our front porch. Needing a new light led us to deciding to get a fan for the front porch. Well, installing a ceiling fan (this is the ceiling fan I picked) isn't simple so we asked our contractor to come back out to install it for us, which then led to me deciding that I definitely wanted to add a storm door. I have always wanted a storm door because the front of our house doesn't get much light downstairs because of our garage. The storm door install led us to changing out our locks and handles to accommodate the door but then when it was time to install the door, new framing needed to be added by our contractor to be able to do the installation. It all ended up being a little more work and money than we had originally anticipated because all we were really planning to do was fix the roof!

pink front door, front porch makeover, front porch, nc blogger, north carolina blogger

After all of the upgrades were completed, it was time to paint the front door. As you saw above, my door was already pink. I've had a pink front door for the past three years or so but I have been wanted to change up the color for awhile. I wanted something lighter and a more neutral pink. The process of selecting a front door color was so complicated! Well, I made it complicated, lol. I had such a hard time making a decision on which color to go with because I didn't want to have to redo it (well, I didn't want Josh to have to redo it). Also, we were painting our new storm door the same color as the door so I really didn't want to have to repaint a new door either. After weeks of going back and forth, I chose a color. Josh painted it on a Friday evening and by Saturday morning, I was always back at Lowe's choosing a new paint color. The first color just didn't feel right. The color I needed up with was Coral Perfection and we got the HGTV HOME by Sherwim-Williams Weathershield paint. I am so happy with the color and I loved it so much that we also painted the door inside of the garage the same color! We are also planning to change up the door color of our storage building in the backyard so that all of our exterior doors are the same color.

pink front door, front porch makeover, front porch, nc blogger, north carolina blogger

Coral Perfection was the perfect color and exactly what I was envisioning when I wanted to change up the shade of our pink front door. I also really love the matching storm door! My wreath is from last year but this budget friendly one is super similar.

pink front door, front porch makeover, front porch, nc blogger, north carolina blogger

While we were at, we changed our pillows. The spotted pillows are actually just covers over the other floral ones that I already had on the porch. I had the covers made by an Etsy creator and I would highly recommend her shop! The black pillows are super inexpensive pillows that I found online at Walmart. I always spray my outdoor pillows and rugs with this water shield spray to keep them looking new!

pink front door, front porch makeover, front porch, nc blogger, north carolina blogger

Also, a front porch makeover wouldn't be complete without a new doormat! Isn't this "Yay! You're here!" mat super cute?! I love it! The black and white layering mat is also reversible! The other side of it has a black pattern. I found both of these cute rugs for $13 each! 

pink front door, front porch makeover, front porch, nc blogger, north carolina blogger

My mom recently gave me some new plants so I painted the pots the same color as the door to help bring everything together. She also gave me the flower pot stands and I gave them a fresh coat of white paint to bring them back to life. It's amazing what a little paint can do!

pink front door, front porch makeover, front porch, nc blogger, north carolina blogger

I am so incredibly happy with how this front porch makeover turned out! This space just makes me smile and I know I will be spending even more time in my rocking chair now that the space has been spruced up. Thank you so much for visiting! I hope you have a great day!

Monday, May 18, 2020

DIY Kitchen Refresh Part Two

diy, kitchen refresh, painted cabinets, home project, nc blogger, north carolina blogger
Hey y'all! I hope you had a great weekend! We spent our weekend celebrating Olivia's eighth birthday and finishing up our final kitchen refresh project. Okay, I saw final but I can't say I won't find another kitchen project! If you want to check out part one of our kitchen refresh, go back and read this post. I answered all of your questions about cabinet painting and changing out our recessed lighting above the sink to a pendant light!

Okay, let's start with the before. I said this in my last post but this kitchen has been one of my least favorite rooms because of the cabinet color. The color just made our space look so dark! Well, we totally solved that problem by painting the cabinets. Now, that we have had them painted for a few weeks, it's just so hard to imagine what they actually looked like before. Living with the painted cabinets and using them like normal, I can definitely tell you that the paint we used it great. I have been able to wipe them down and even scrub off a spill with no issue. 

B E F O R E

diy, kitchen refresh, painted cabinets, home project, nc blogger, north carolina blogger

A F T E R

diy, kitchen refresh, painted cabinets, home project, nc blogger, north carolina blogger

I love walking into my beautiful white kitchen now! It just really feels like a brand new space. But, there was still one thing I wanted to fix. The material that our bar is constructed out of is just very low quality. It was also just put together really poorly because you could always see the seam where they put the two pieces of material together. My kids always sit there for breakfast + lunch and of course, they are always kicking their feet and bumping into the bar. Well, that seam would literally move and push in... I can't believe that whole thing never just fell apart! For years, I have wanted to do something about it. I had this idea to cover the bar in beadboard probably three or four years ago but I didn't think it would look good with our original cabinet color. After painting the cabinetry white, this seam on the bar bugged me even more since the rest of the space looked so good. 

Friday morning, I shared my design plan with Josh and by that afternoon, he had the supplies to make my vision come to life. Goodbye ugly seam and hello more durable (and beautiful) bar! Josh will tell you that was a very mathematical project and one that I'm glad he did because honestly wouldn't have had the patience to do it myself. He bought two sheets of this beadboard at Lowe's, wood glue, finishing nails, and putty to complete this project. He measured everything out and used a saw to cut the beadboard to fit the space. He attached the beadboard with wood glue and nails then used putty to fill in some gaps. On Sunday, he went back and painted the beadboard with two coats of the same paint we used on the cabinets. 

B E F O R E


A F T E R

diy, kitchen refresh, painted cabinets, home project, nc blogger, north carolina blogger

I absolutely love how it turned out! It makes the bar look so much better and it's so much more sturdy + durable! We also added the beadboard to the side over by the door as well to complete the transformation. I shared this project on my Instagram Stories yesterday and several people asked me about the missing the outlet at the end of the bar. This was something we went back and forth about but ultimately decided we could live without it. We were going to cut the beadboard to accommodate the outlet but I thought it would give us a much cleaner look without it. For safety, we had to cap the wires in the outlet so that they wouldn't touch each other. We have seven other outlets in our kitchen space so I don't think we will miss this one at all. I'm glad we decided to ditch the outlet! I'm so happy with how our kitchen refresh turned out and we did it all for under $300!

diy, kitchen refresh, painted cabinets, home project, nc blogger, north carolina blogger

Let me know if you have anymore questions about this project. I'm happy to help!
Thanks so much for visiting! Have a great day!

Monday, April 27, 2020

DIY Kitchen Refresh Part One

kitchen refresh, painting kitchen cabinets, diy, budget friendly diy, how to paint cabinets
Hey y'all! I hope you had a great weekend! We spent our weekend working on a DIY kitchen refresh and I'm so excited to share how it turned out. My husband and I bought our house over 11 years ago and we have never liked the cabinets in our kitchen. The house was new when we purchased it but it was already finished when we bought it so we didn't get to choose anything. Well, not long after we bought our house, we had Julianna then 26 months later, we had Olivia so we just got busy raising babies. The kitchen went on the back burner and we invested in baby nurseries instead. Well, now that we have had more time at home, we have been busy getting unfinished projects completed. I say we, but mostly Josh. I'm the creative director! He's painted our upstairs hallway, the girls' bathroom, the laundry room, and he repainted our bedroom. This weekend, it was the kitchen's turn to get a refresh and he wouldn't let me sit out on this one! We tag teamed this project and we couldn't be more proud of how it looks now. We haven't stopped talking about it! Also, this refresh was super affordable. We spent under $200 for everything and that includes a couple of energy drinks that supposedly just fell into the shopping cart, according to Josh!

Below, you find the BEFORE picture. Our cabinets were a basic tan color. Everything in the room just felt very monochromatic with the tan floor and tan back splash. The kitchen gets good natural lighting but this room just felt dark to me. Now, let's answer some of your questions!

kitchen refresh, painting kitchen cabinets, diy, budget friendly diy, how to paint cabinets

DID YOU SAND THE CABINETS FIRST?
No, we did not sand the cabinets. I think it's also important to note that our cabinets are not made of solid wood. They are cheap, man made wood and honestly, they aren't great quality. If we had a big budget, I would have totally replaced all of the cabinets but that's just not going to happen so paint was the next best thing.

DID YOU USE A PRIMER?
Nope! We didn't use a separate primer. We just cleaned the cabinets and went for it!

WHAT KIND OF PAINT DID YOU USE?
First off, I didn't even realize that we could paint these cabinets given that they were fake wood so Josh chatted with the paint expert at Home Depot to find out the best paint to use for this project. We went with Behr Marquee Ultra Pure White Satin Enamel Interior Paint and Primer in One

WHAT KIND OF FINISH DID YOU USE?
We went with a satin finish. One of our main requirements was that our cabinets be easy to clean and I personally didn't want a glossy finish so that's why we went with the satin. It was the finish that was also recommended for this particular project.

HOW MUCH PAINT DID YOU USE?
When we purchased the paint, we got one gallon plus one quart, just to be safe. We weren't really even sure how much it would take or even how many coats we would need to do. I would describe our kitchen as "medium size" because it's not huge but it's not tiny either. I have no idea the exact measurements but we have 21 cabinets, a bar, and 8 drawers. Everyone is super surprised to find out that we only use one gallon of paint for this project! When I went back to take the picture of the paint can, it actually wasn't even empty. We still have some paint left from the first gallon to do touch ups! I couldn't believe it myself! This is really good paint because we did a total of three coats (rolling) and then touch ups (brush). 

HOW LONG DID IT TAKE TO PAINT?
Well, I've never painted anything myself (besides artwork or spray paint) and cabinets were a first for my husband as well. We didn't really know how long it would take to do the painting but all he knew was that he wasn't doing it alone! He removed the hardware and taped off the kitchen in advance but we did all of the painting in about eight hours on Saturday but that was both of us painting together. 

WHAT PARTS DID YOU BRUSH AND WHAT DID YOU ROLL?
We started by rolling everything with a small roller. We got as close as we could and did three full coats with the roller. With the brush, we went back in to get the edges, corners, and small areas that we couldn't reach with the brush. We also used the brush to do some touch ups. We used a medium sized brush for the brush work. The smaller the brush, the better for getting the small areas. I personally liked painting with the brush better because it felt more controlled but rolling the larger areas helped us given even coats, much faster.

DID YOU TAKE OFF THE DOORS AND DRAWERS TO PAINT?
At first, I thought we were going to have to take the doors off to paint the cabinets and remove the drawers but it wasn't necessary. We were able to leave them on (which saved a lot of time) to do all of the painting since we didn't need to do any sanding! Just be sure to tape everything off first.

kitchen refresh, painting kitchen cabinets, diy, budget friendly diy, how to paint cabinets


And... this is the AFTER! Doesn't it look like a brand new space?! The white paint instantly brightened up the room and really just made it feel bigger, too.

kitchen refresh, painting kitchen cabinets, diy, budget friendly diy, how to paint cabinets

kitchen refresh, painting kitchen cabinets, diy, budget friendly diy, how to paint cabinets

We had considered changing out the hardware but it was more budget friendly to keep what we had plus I really liked the way the current hardware looked with our appliances. The finishing touch for this kitchen refresh was adding this mini pendant light above the sink! I am obsessed with light (just ask my husband) and I really wanted more light over the sink. I also just really love pendant lights and vintage bulbs, too! I feel like the new lighting was just the icing on the cake!

kitchen refresh, painting kitchen cabinets, diy, budget friendly diy, how to paint cabinets

IS IT HARD TO CHANGE RECESSED LIGHTING TO A PENDANT LIGHT?
Honestly, this question would be best answered by my husband because I had zero to do with the installation of this light. Again, I'm the creative director, lol! But, I was there for moral support so I can share from my point of view. We have recessed lighting in our kitchen and there was a can right above our sink. I knew it was possible to do a pendant light there but I just wasn't really sure how to go about it. Well, we got the light fixture and got home, thinking it would be a simple switch. Nope, you have to have a recessed light converter kit so Josh had to go back out to get one. He's not an electrician but he was able to follow the directions and successfully install the light. There were definitely some frustrations along the way but it wasn't super complicated; more tedious than anything. It took a couple of hours total to figure everything out and get it up. He's so proud of his handy work and I love how it gives the space even more light!

kitchen refresh, painting kitchen cabinets, diy, budget friendly diy, how to paint cabinets


kitchen refresh, painting kitchen cabinets, diy, budget friendly diy, how to paint cabinets


Thanks so much for visiting! Let me know if you have any more questions!

Saturday, February 8, 2014

thrifty: coconut oil uses

Coconut oil. It's something I use every single day. My husband makes fun of me because if says it's my miracle fix for everything. But really, it is. I have discovered so many amazing uses for this stuff. And a big bonus is that it's very cheap and lasts a long time!

For Beauty

Daily I use it as a moisturizer. I have super dry skin. I use it along with my daily facial moisturizer with some extra moisture. I also use it daily to take off my eye makeup. I put a little on a cotton ball and my eye makeup (eye liner, eye shadow, and mascara) come right off! No more buying those expensive little bottles of eye makeup remover. It's all natural and safe so I don't have to worry if it gets in my eyes. 

Like I mentioned in my last beauty post, I use coconut oil in my hair. About one a month, I massage a little bit of it in my scalp and then wash and condition as normal. It has helped with my dry scalp to much. It leave my hair a little shiny after the first washing but by the second washing, my hair feels so healthy and looks great.

I have pinned a few more beauty related ideas using coconut oil on Pinterest. I plan to try a facial scrub and a deodorant using it very soon.

For the Home

I have used coconut oil for cooking, of course. It's a great replacement for oil in many baking recipes. I've also used it to saute veggies. It adds great flavor to food!

One of my coolest discoveries is that it works to remove stickiness from about anything. I had a sticky decal on my old car that I needed to remove before I traded it in and I couldn't get it off. I tried a little coconut oil since I was out of Goo Gone and it worked like a charm. Amazing!

Another cool trick is using it as a bath tub cleaner. I scrubbed and scrubbed my bathtub one day and couldn't get it clean. I was using all sorts of cleaning products and nothing worked. Well I tried coconut oil applied to a washcloth and it cleaned my tub perfectly. Seriously, so cool. My husband couldn't even believe it worked. 

What cool ways have you used coconut oil? I'd love to hear!

Saturday, January 21, 2012

our latest projects

Our main project at the moment is Olivia's room. Josh painted it yellow, a color that I picked out, but I'm just not sold on the color yet. I think it's just brighter than what I had in mind. We ordered her furniture this week--it's white so I'm hoping once we get everything in there and in it's place, the color won't seem quite so dramatic.

Olivia's room in progress. We have a lot to do!

BRIGHT yellow walls!

This is the prayer that I say with Julianna each night before bed. Julianna has a wooden plaque with this prayer on it in her bedroom--it's the same one that I had in my bedroom as a child. I order this canvas print from Etsy with the same prayer on it. It was about $10.00 with shipping. I bought the frame at a thrift store for $1.50. Josh spray painted it and now it's good as new. I love how this turned out!

I have done a project similar to this one before. It's recycled art using toilet paper rolls. It's cheap and so much fun to create. The last one I created was just an abstract design. This one has been a little more challenging because it's a flower. I have been working on it for about 2 weeks and I'm getting closer to being done. It's one of those projects when it's hard to decide when you're done. The flower will be pink and white. It's also for Olivia's bedroom.


It was time for a new wreath. I looked at my front door in mid-January and realized that I still had my Christmas wreath on the door. I found the pretty, polka dotted letter S at the thrifted store for just 50 cents! A little laquer and glue and it's good as new. I picked up the wreath at Wal-Mart for $3.00 and the green tulle for $2.50 (we didn't end up using much of the roll at all so I can use the rest for a future prokect). This was a very inexpensive way to spruce up the front door!

Sunday, August 14, 2011

kitchen addition

We have a new addition to our kitchen as of today. Josh has been eying a pot rack at his parent's house for awhile now. They recently moved and were getting rid of some things and Josh lucked up and got it! He sprayed painted it with a textured black paint as well as the formally silver chain. It's now a great addition to our kitchen and helps us free up a lot of cabinet space. He did a great job repainting it and getting it hung up! Check it out...


Tuesday, June 28, 2011

happy 3rd anniversary!

Today is our third wedding anniversary. It's kind of hard to believe that 3 years have passed. Time flies when you're having fun! We actually got pregnant around 1st wedding anniversary, had a 3 month old on our 2nd wedding anniversary, and here we are now at 3 years, trying for our next baby. We've been busy!

During the past 3 years, we have bought a home together, job changes, 2nd (and 3rd) dog, we had a beautiful baby girl, and we found our church home. So many wonderful things have happened to us. So many challenging things as well. I am beyond thankful that God gave me Josh to share this journey with. He's truly my rock, my best friend, my sweetheart, and my little girl's amazing father. 

Here's to many more years together. Through the ups and downs, you have my love and support. You always will. Happy Anniversary! 

And now a few wedding pictures for memory lane purposes...